A classroom charging station can look tidy and still fail at the one moment that matters: when twenty students reach for devices at once. A cable can be pinched behind a cart, a plug can be carrying the cart’s weight, or the only route to the wall can cross the path between desks.
This is a room check for the adult responsible for the equipment, not an electrical repair guide. It takes about five minutes when the cart, chargers and wall outlet are already approved for the room. If a plug, outlet or cable is damaged, stop there and send the problem to the school facilities or IT team.
The first rule is deliberately unglamorous: do not solve a capacity problem by adding another cord. The U.S. Consumer Product Safety Commission advises against overloading extension cords and power strips and recommends replacing worn or cracked cords. Its short power-cord safety guide is a useful early boundary for any classroom setup.
Begin at the wall, before counting devices
Park the charging cart where it can use the outlet selected for it. The cart should not need to sit in a doorway, narrow the route between desks or stretch its lead across a student walking line. Lock the casters if the cart has brakes, then look at the power lead without moving the plug.
You are checking for a short, calm route: outlet to cart, with no chair leg, door edge or sharp corner pressing on the cable. Do not run the lead under a rug or improvise a permanent route with tape. A room that needs a longer electrical run needs a facilities decision, not a longer temporary cord.
Now look at the plug itself. It should sit fully in the outlet without sagging, scorching or looseness. The cord should not pull sideways on the plug. If the outlet face moves, feels warm, looks discoloured or will not hold the plug securely, leave the station unplugged and report the exact outlet location.
Follow one cable all the way to one device
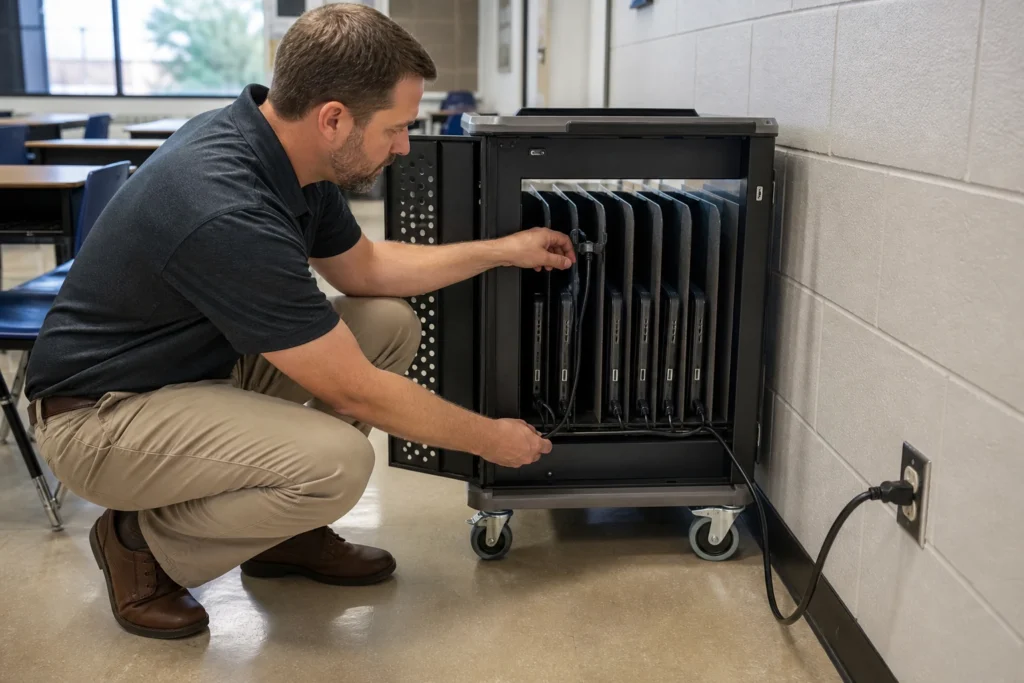
Open the cart and choose a single device. Trace its charger from the device port, through the divider or cable channel, to the internal power connection. This is faster and more revealing than looking at the whole bundle from a distance.
The cable should bend gently, not fold sharply at the connector. The device should sit in its own slot without resting on the connector or trapping the lead against metal. The charger brick, if there is one, needs a stable place where it cannot drop when the door opens.
Repeat the same trace for the top slot, the middle slot and the bottom slot. Those three positions usually expose different faults: a short lead at the top, a tangled bundle in the middle or extra cable resting near a caster at the bottom. If one route is wrong, correct the routing with the cart unplugged and follow the cart manufacturer’s cable-management method.
Inspect the parts students actually handle
Students usually touch the device end of the cable, not the power strip hidden in the cart. Check every connector that students will pick up. Look for a bent shell, split insulation, exposed material, a connector that sits crooked or a strain-relief section that has pulled away from the cable jacket.
Do not use tape as a cosmetic cover and put the charger back into service. The Occupational Safety and Health Administration’s guidance on visual inspection of cord-connected equipment names loose parts, deformed pins and damaged or crushed jackets as defects to catch before use. That guidance is written for workplaces; here, the practical lesson is simply to remove questionable equipment from the classroom routine and let qualified staff decide what happens next.
Check the cart door as well. Close it slowly while watching the cable channels. A door that only closes when a bundle is pushed hard into a corner is not ready. The same is true when the door latch presses on a charger lead or when a loose cable can fall into a wheel path.
Run the routine once without students
A technically neat cart can still create a poor classroom routine. Stand where a student would stand, open the correct side and remove one device. The connector should come free without pulling another cable or moving the cart. Return the device to the same slot and reconnect it without reaching behind live equipment.
Next, imagine the busiest minute of the day. Can two students collect devices without blocking the doorway? Can the teacher see which slot is empty without opening a second compartment? Does the cart door stay out of the aisle? If the answer is no, change the cart position or the collection sequence, not the electrical system.
Use the school’s existing inventory method to match devices, chargers and slots. A simple slot number can help, but do not add stickers over vents, serial labels or ports. The goal is a repeatable handoff: one student, one slot, one cable, with no need to tug on the bundle.
Make charging and long-term storage two different plans
Daily classroom charging and summer storage are not the same job. For an ordinary school day, the operational question is whether the approved cart can charge the devices safely and leave them ready for the next class. For a long break, battery condition and storage procedure become separate concerns.
Google’s guidance for storing Chromebooks long term recommends preparing the battery and not leaving devices connected to a cart or charger for months. Follow the device maker and school IT instructions for the actual fleet; do not turn a daily charging routine into a summer-storage policy by accident.
Before a long closure, record who will disconnect the cart, how the devices will be prepared and when they will be checked again. That decision belongs in the school technology plan, not on a handwritten note taped to the cart.
A five-check release decision
The station is ready for students only when all five answers are yes:
- Wall route: the cart uses its approved nearby outlet and no lead crosses a walking path.
- Cable condition: plugs, jackets and strain-relief sections show no visible damage.
- Internal routing: each sampled cable reaches its device without sharp bends, pinching or weight on the connector.
- Student routine: one device can be removed and returned without pulling other leads or moving the cart.
- Room plan: the cart door, casters and collection point do not block the aisle or doorway.
If one answer is no, the useful result is not “almost ready.” Leave the affected section out of service, write down the exact fault and send that specific problem to the person who can fix it. A precise note such as “bottom-slot charger jacket pinched by right door” is far more useful than “cart not working.”
The quiet test is the real test
The best classroom charging station is not the one with the most slots or the brightest indicator panel. It is the one that can be checked quickly, used without tugging or crowding and left in a known state for the next class.
Do the inspection when the room is empty. Follow a cable instead of admiring the bundle. Test the student movement instead of assuming it. Five quiet minutes before the first device is collected can prevent the small routing fault that otherwise appears during the busiest part of the day.